Two distinct ways to frame a stone
Bezel vs. prong settings: compare the same stone in both directions.
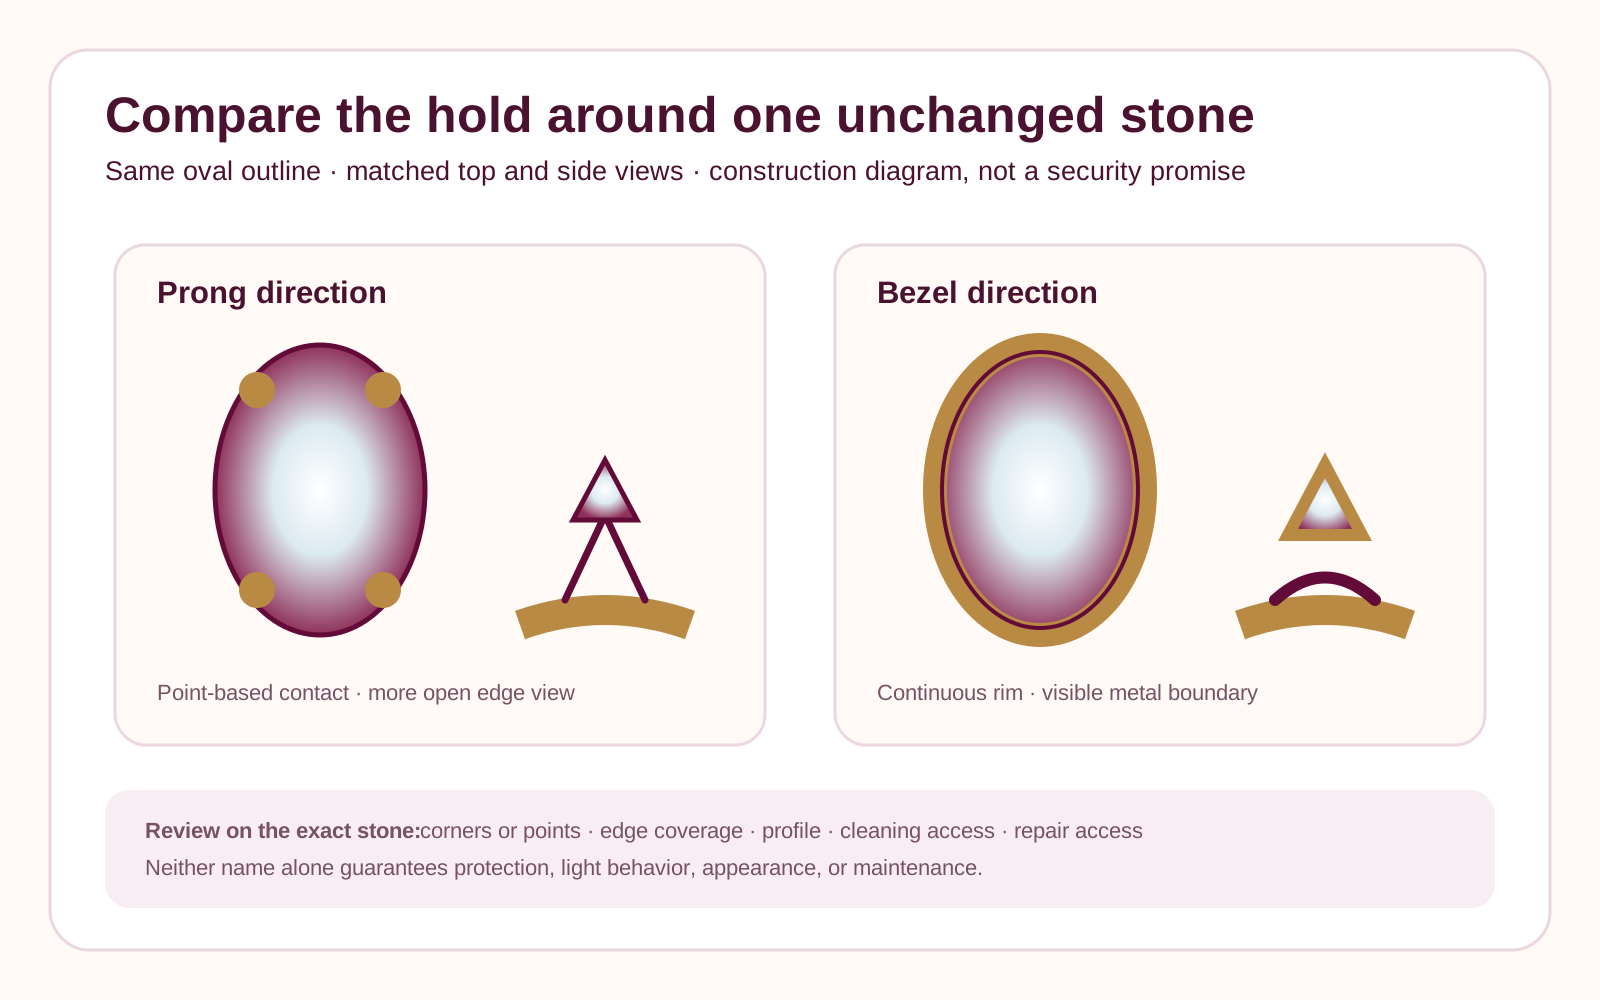
Prongs can leave more of the stone visible, while a bezel can create a defined metal edge. The right direction depends on the exact stone, profile, routine, and look you enjoy.
Interactive setting comparison
Compare edge coverage on the same exact stone direction
Use matched top and side views so metal coverage, not a different stone or photograph, drives the decision.- ProngSelected contact points leave more of the stone edge visually open.
- BezelA metal rim creates a more continuous visible boundary.
- Compare bothHold stone shape, dimensions, metal, and view constant.
A thoughtful answer before the next step
Should I choose a bezel or prong setting?
What matters here
Compare outline visibility, edge coverage, cleaning access, snag profile, stone shape, visual weight, and repair expectations; ask for human review of the actual stone and design.
Real ways this can begin
Find the path that feels closest to yours
An active wearer may value a smooth low-profile bezel, while someone drawn to a lighter, more open center may prefer prongs.
Keep what you already know, then compare the open choices without starting over.
When the direction feels ready, start a design with these preferences and continue with the next open choice.
Compare the decision in context
Compare three useful directions for bezel versus prong ring settings
There is no automatic winner. Compare how “Prong setting,” “Full bezel,” and “Partial bezel” answer the same practical needs.
| Direction | Prong setting | Full bezel | Partial bezel |
|---|---|---|---|
| Works well when | Stone outline and open space should remain visible. | A continuous metal border and smoother outline suit the design. | You want some rim coverage while keeping parts of the edge open. |
| Reason to reconsider | Exposed edges, points, or catching are a concern. | You want minimal visible metal around the stone. | The exact stone shape needs support where the opening occurs. |
| Keep in the brief | Keep corners, points, dimensions, and proportions visible. | Choose open points, partial rim, or a full border. | Compare how the hold changes the side view and wear. |
| Review before choosing | See how the border or prongs frame the stone. | Include work, gloves, impact, and snagging concerns. | Review the setting with the intended wedding band or stack. |
See how the choice changes
Three ways balancing open light with an enclosed rim can begin
These examples show how balancing open light with an enclosed rim may begin. They are planning scenarios, not customer stories or finished-piece promises.
When “Prong setting” may fit
Stone outline and open space should remain visible.
- Direction
- Begin with the “Prong setting” option, then compare it with “Full bezel” while the rest of the piece stays steady.
- Why it helps
- This keeps the leading priority clear. Before choosing, check whether exposed edges, points, or catching are a concern.
Why “Full bezel” is worth comparing
A continuous metal border and smoother outline suit the design.
- Direction
- Place the “Full bezel” option beside “Prong setting” and “Partial bezel” so the tradeoff stays visible.
- Why it helps
- This comparison shows what full bezel adds without hiding whether you want minimal visible metal around the stone.
Before choosing “Partial bezel”
You want some rim coverage while keeping parts of the edge open.
- Direction
- Keep the “Partial bezel” option in the design long enough to test it against “Prong setting” and “Full bezel.”
- Why it helps
- Keeping this direction visible lets you test it honestly. Review whether the exact stone shape needs support where the opening occurs before deciding.
Questions people ask in plain language
Answers for balancing open light with an enclosed rim
Open the answer that helps with balancing open light with an enclosed rim. Each response stays tied to “Should I choose a bezel or prong setting?”
What should I compare first for bezel versus prong ring settings?
Compare a prong and bezel preview using the same stone, band, metal, and profile; then review protection and care for the exact direction.
When does prong setting support this design?
This comparison is useful when you know the center-stone direction but are deciding between an open classic hold and a more continuous metal outline.
What could make prong setting less suitable for the wearer?
Do not choose from the setting name alone. A poorly proportioned bezel can feel heavy, while exposed or worn prongs can create concerns in active use.
How should everyday wear influence a prong setting setting?
Both settings need care and inspection. Daily suitability depends on the exact stone, construction, profile, routine, and condition over time.
Which structure and fit details should stay with prong setting?
Before continuing, review these three details together: keep corners, points, dimensions, and proportions visible; choose open points, partial rim, or a full border; and compare how the hold changes the side view and wear. You can adjust each one again in Atelier.
Carry the useful details forward
Keep the brief clear when you continue
Compare outline visibility, edge coverage, cleaning access, snag profile, stone shape, visual weight, and repair expectations; ask for human review of the actual stone and design.
Keep corners, points, dimensions, and proportions visible.
Choose open points, partial rim, or a full border.
Compare how the hold changes the side view and wear.
See how the border or prongs frame the stone.
Include work, gloves, impact, and snagging concerns.
Review the setting with the intended wedding band or stack.

A visual map of this brief
See what stays known—and what remains open
This guide begins with “Compare metal coverage, stone visibility, wear, and the exact shape.” The next choices stay grouped, editable, and connected to that same Atelier brief.
- How should the stone be held?Compare both directions around the same stone shape, dimensions, metal, and profile.
- Edge coverage or prong detailThis is a private construction note. The exact stone and craft review decide the final geometry.
Start with what matters on this page
Compare bezel and prong around the same stone
Choose the hold first. Then add only the coverage detail, profile, and wearing routine that should guide the next design directions.Published customer proof
Real experiences, kept separate from promises
Only approved purchase-linked reviews appear here. An illustrative scene is never presented as a customer, and one person’s experience is never treated as a promise for another piece.See what Leyloon customers have shared
Read recent shop reviews on Etsy, then come back when you are ready to shape your own setting direction.
These reviews reflect individual Leyloon service experiences. Your setting direction and quote request are reviewed on their own.